
MEXTURES SESSIONS: GNARLY FORMULAS
Recently we’ve been inspired by users creating hyper-colorful, over-exposed, and otherwise gnarly edits using Mextures. So we thought that we’d put together a helpful tutorial to others who may be inspired by this type of work but unsure of how to accomplish it themselves. We used two images from @thun_der_bolt that are featured right now over at the Mextures Collective. Read along and learn along!
Formula Code: YZDYXKP
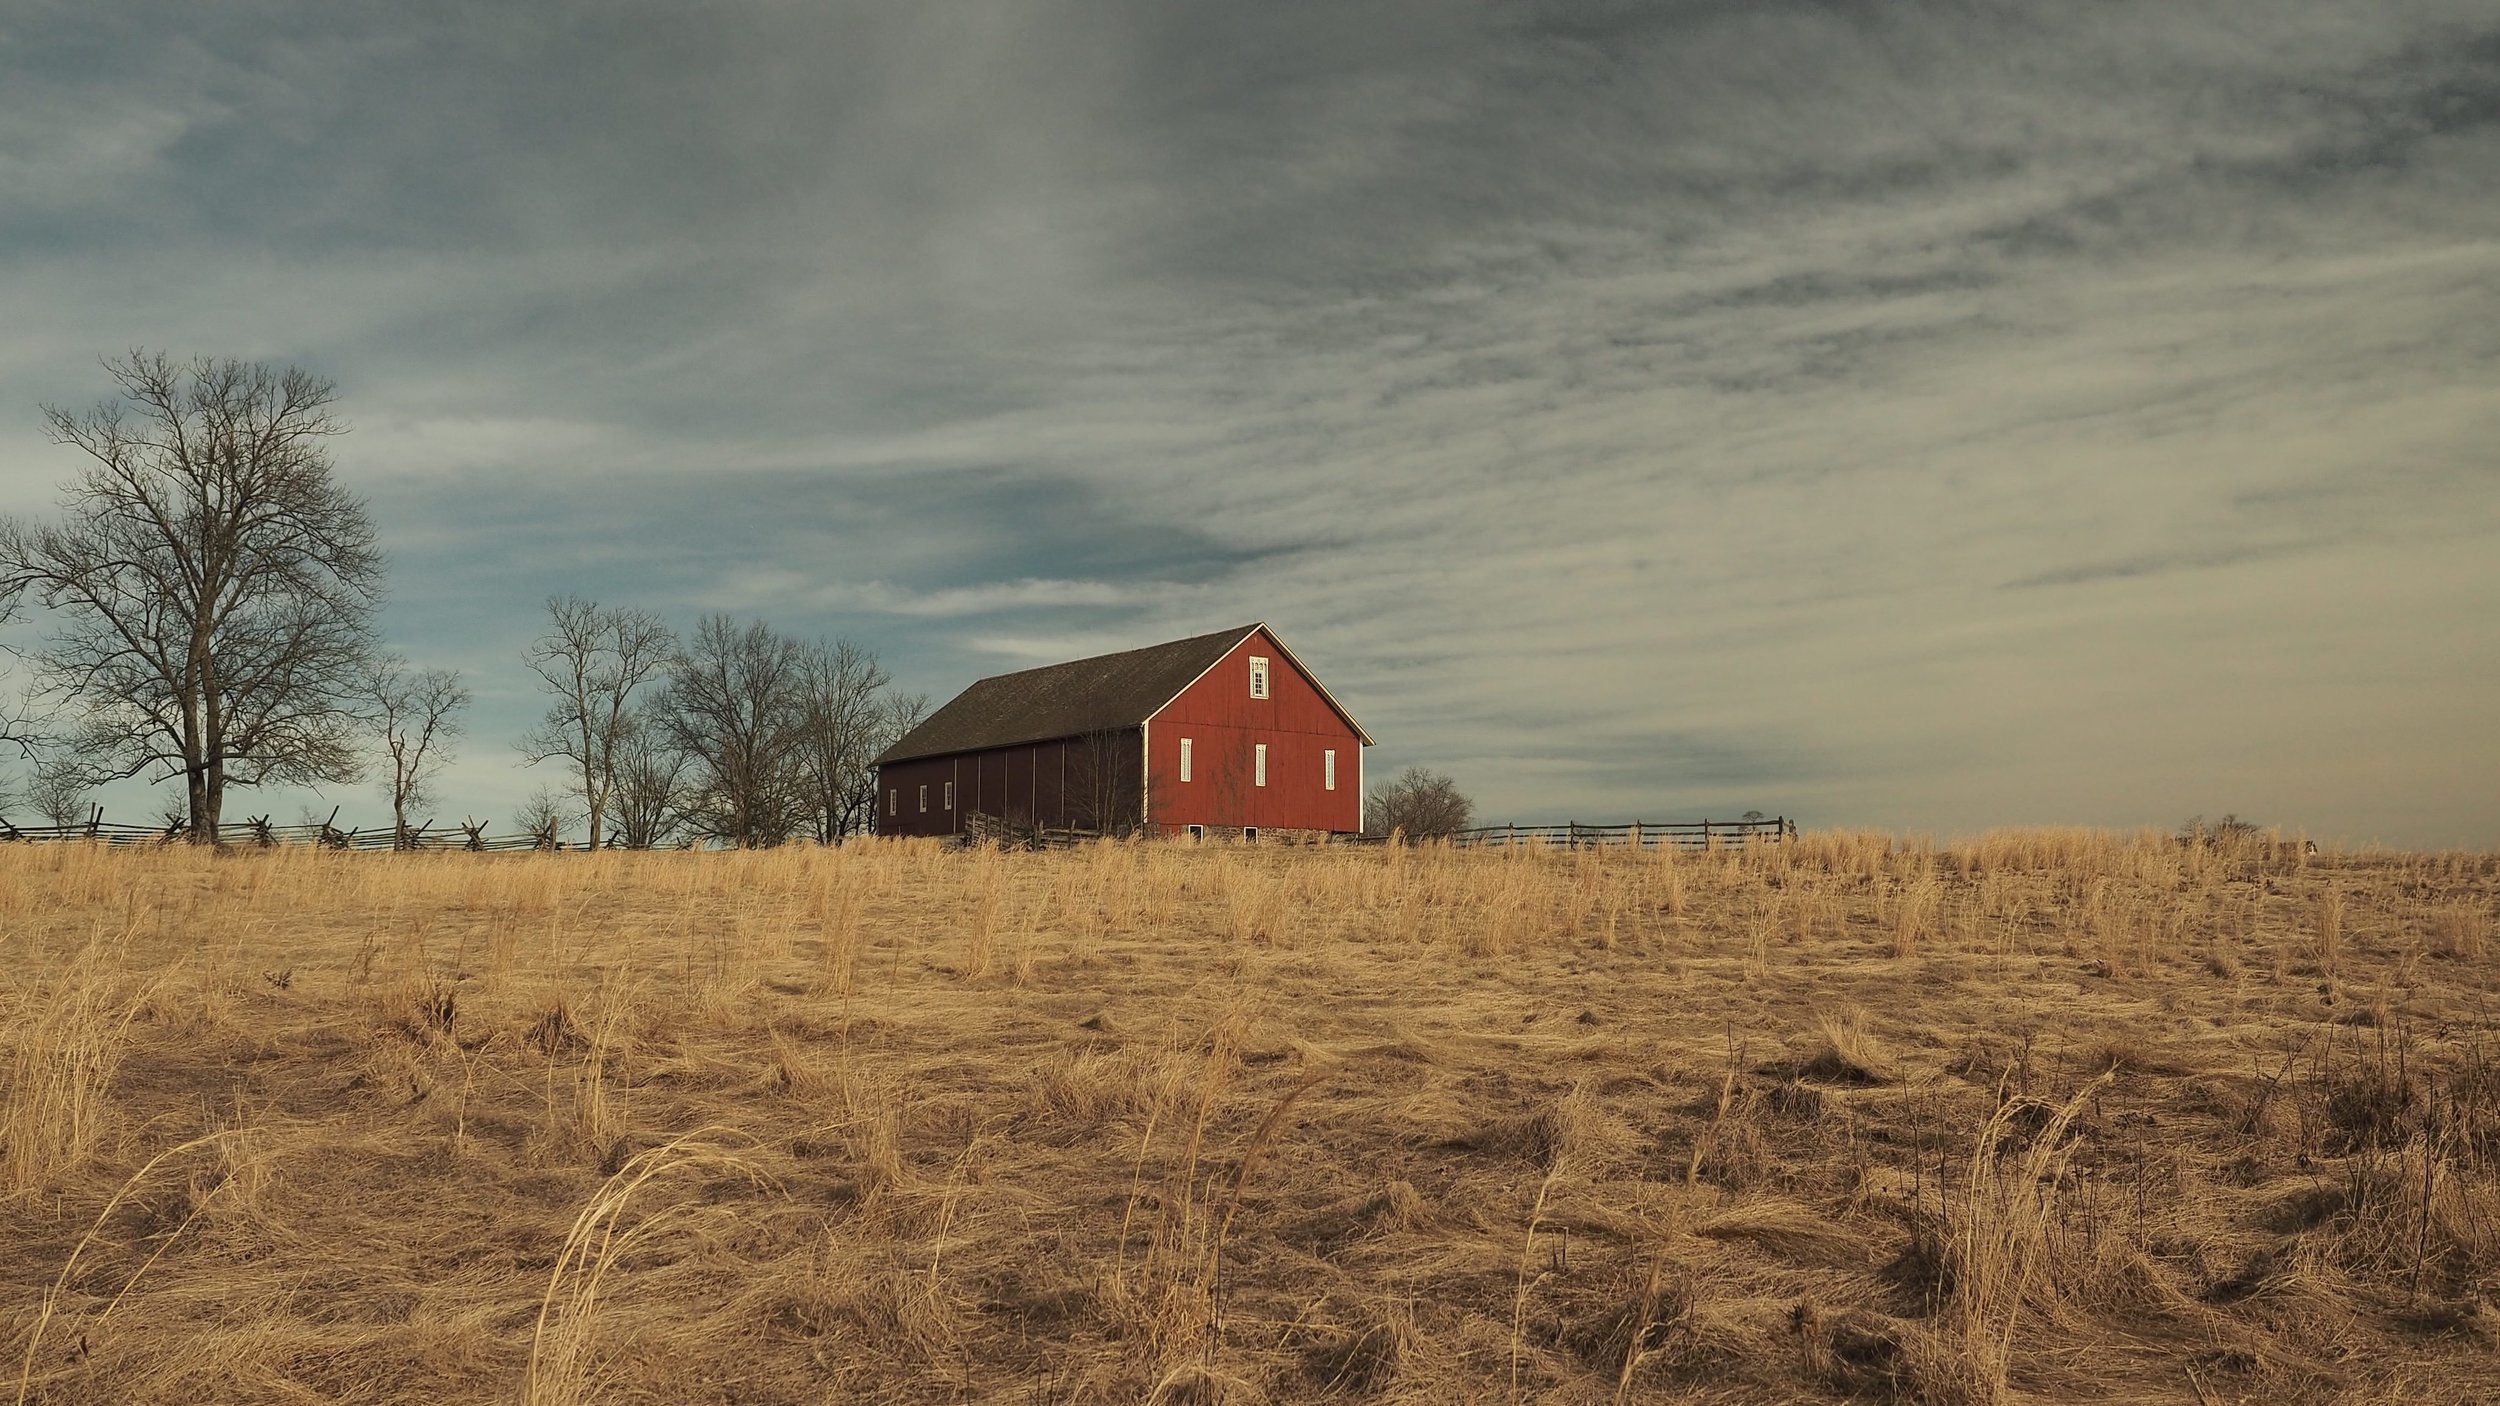
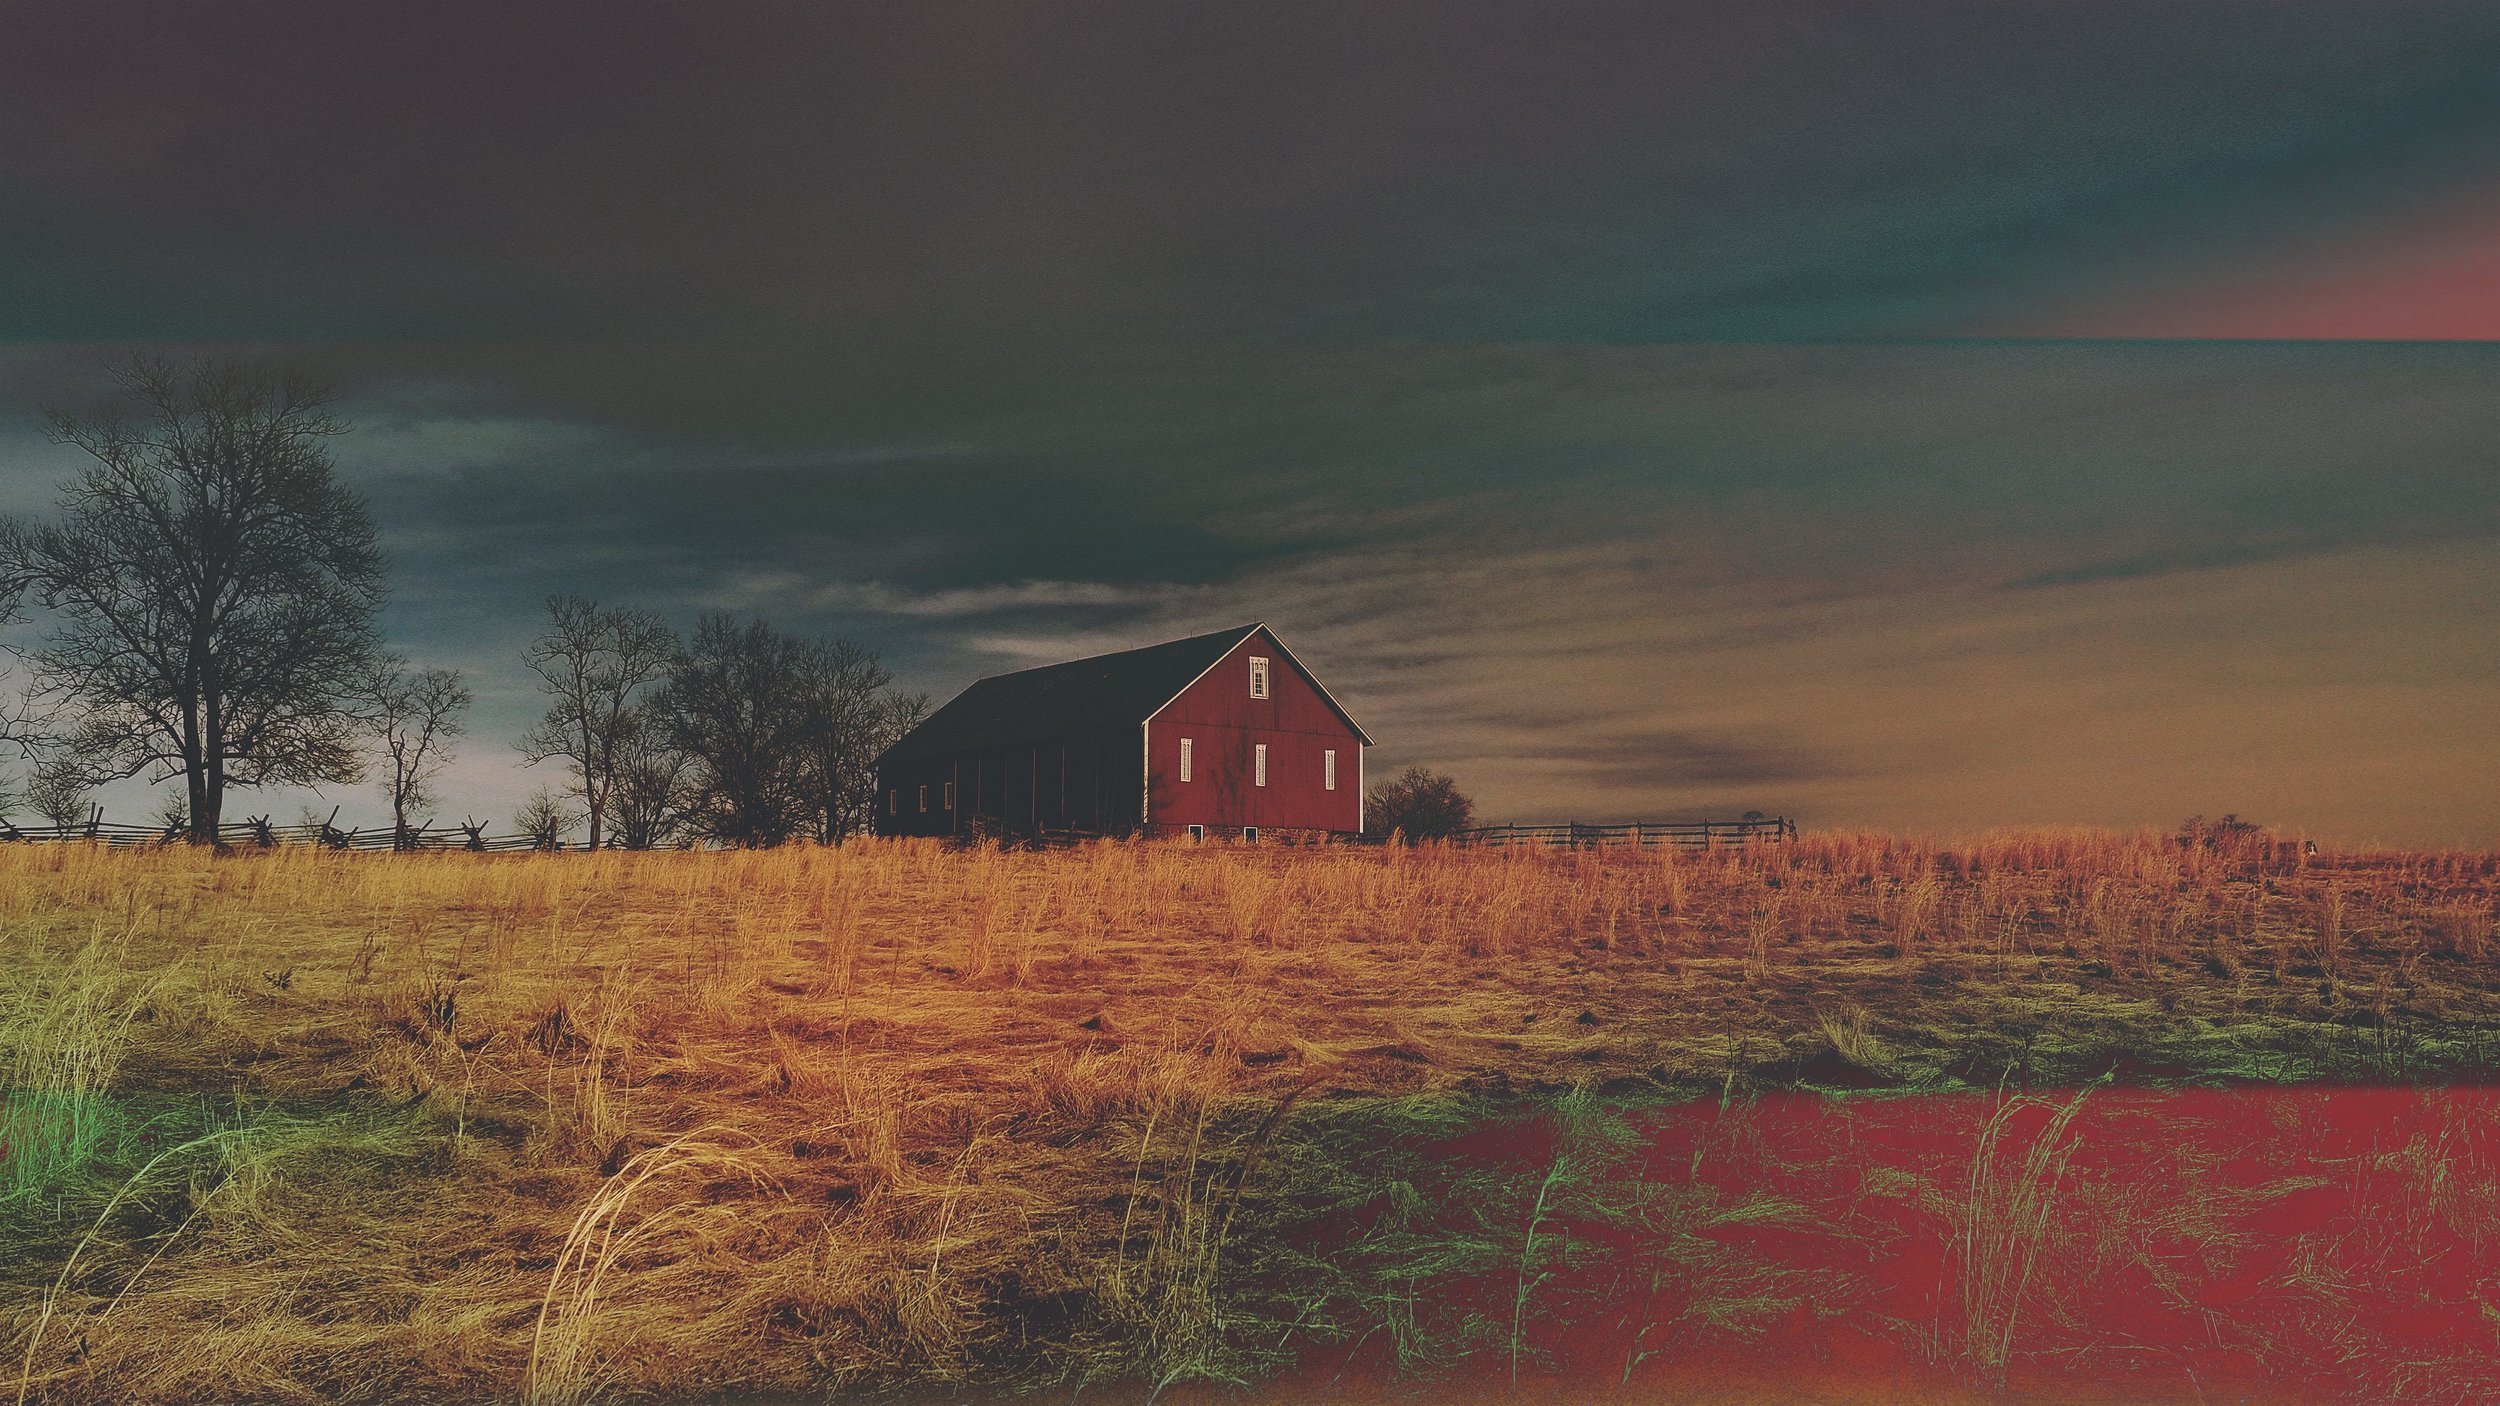
I snagged this gorgeous shot by @thun_der_bolt because of all of the open space in the image. I wanted to start strong so I went straight to the Radiance pack, selected the LILY overlay and then blended it in Difference mode. Here, WINTER SKIES from Landscape Enhance blended in Overlay mode, helps me to both smooth out and fade the blues and grays in the shot. In the Light Leaks 3 pack I selected the PARIS overlay because of the straight lines that I could utilize to frame up the barn. Again, blending it in Difference mode adds a unique, bright, super-exposed feel. The last thing I did with the overall color of the image was to add NAVY from the X-film pack. This overlay, blended in Exclusion mode, helps me set up my toning work as I had to the Adjustments section. Here I add the F-SUPERIA film preset because I felt like it highlighted the fade and coloration that I had built thus far before finally playing with the exposure, contrast, temperature and sharpness.
Formula Code: BXUBIFD
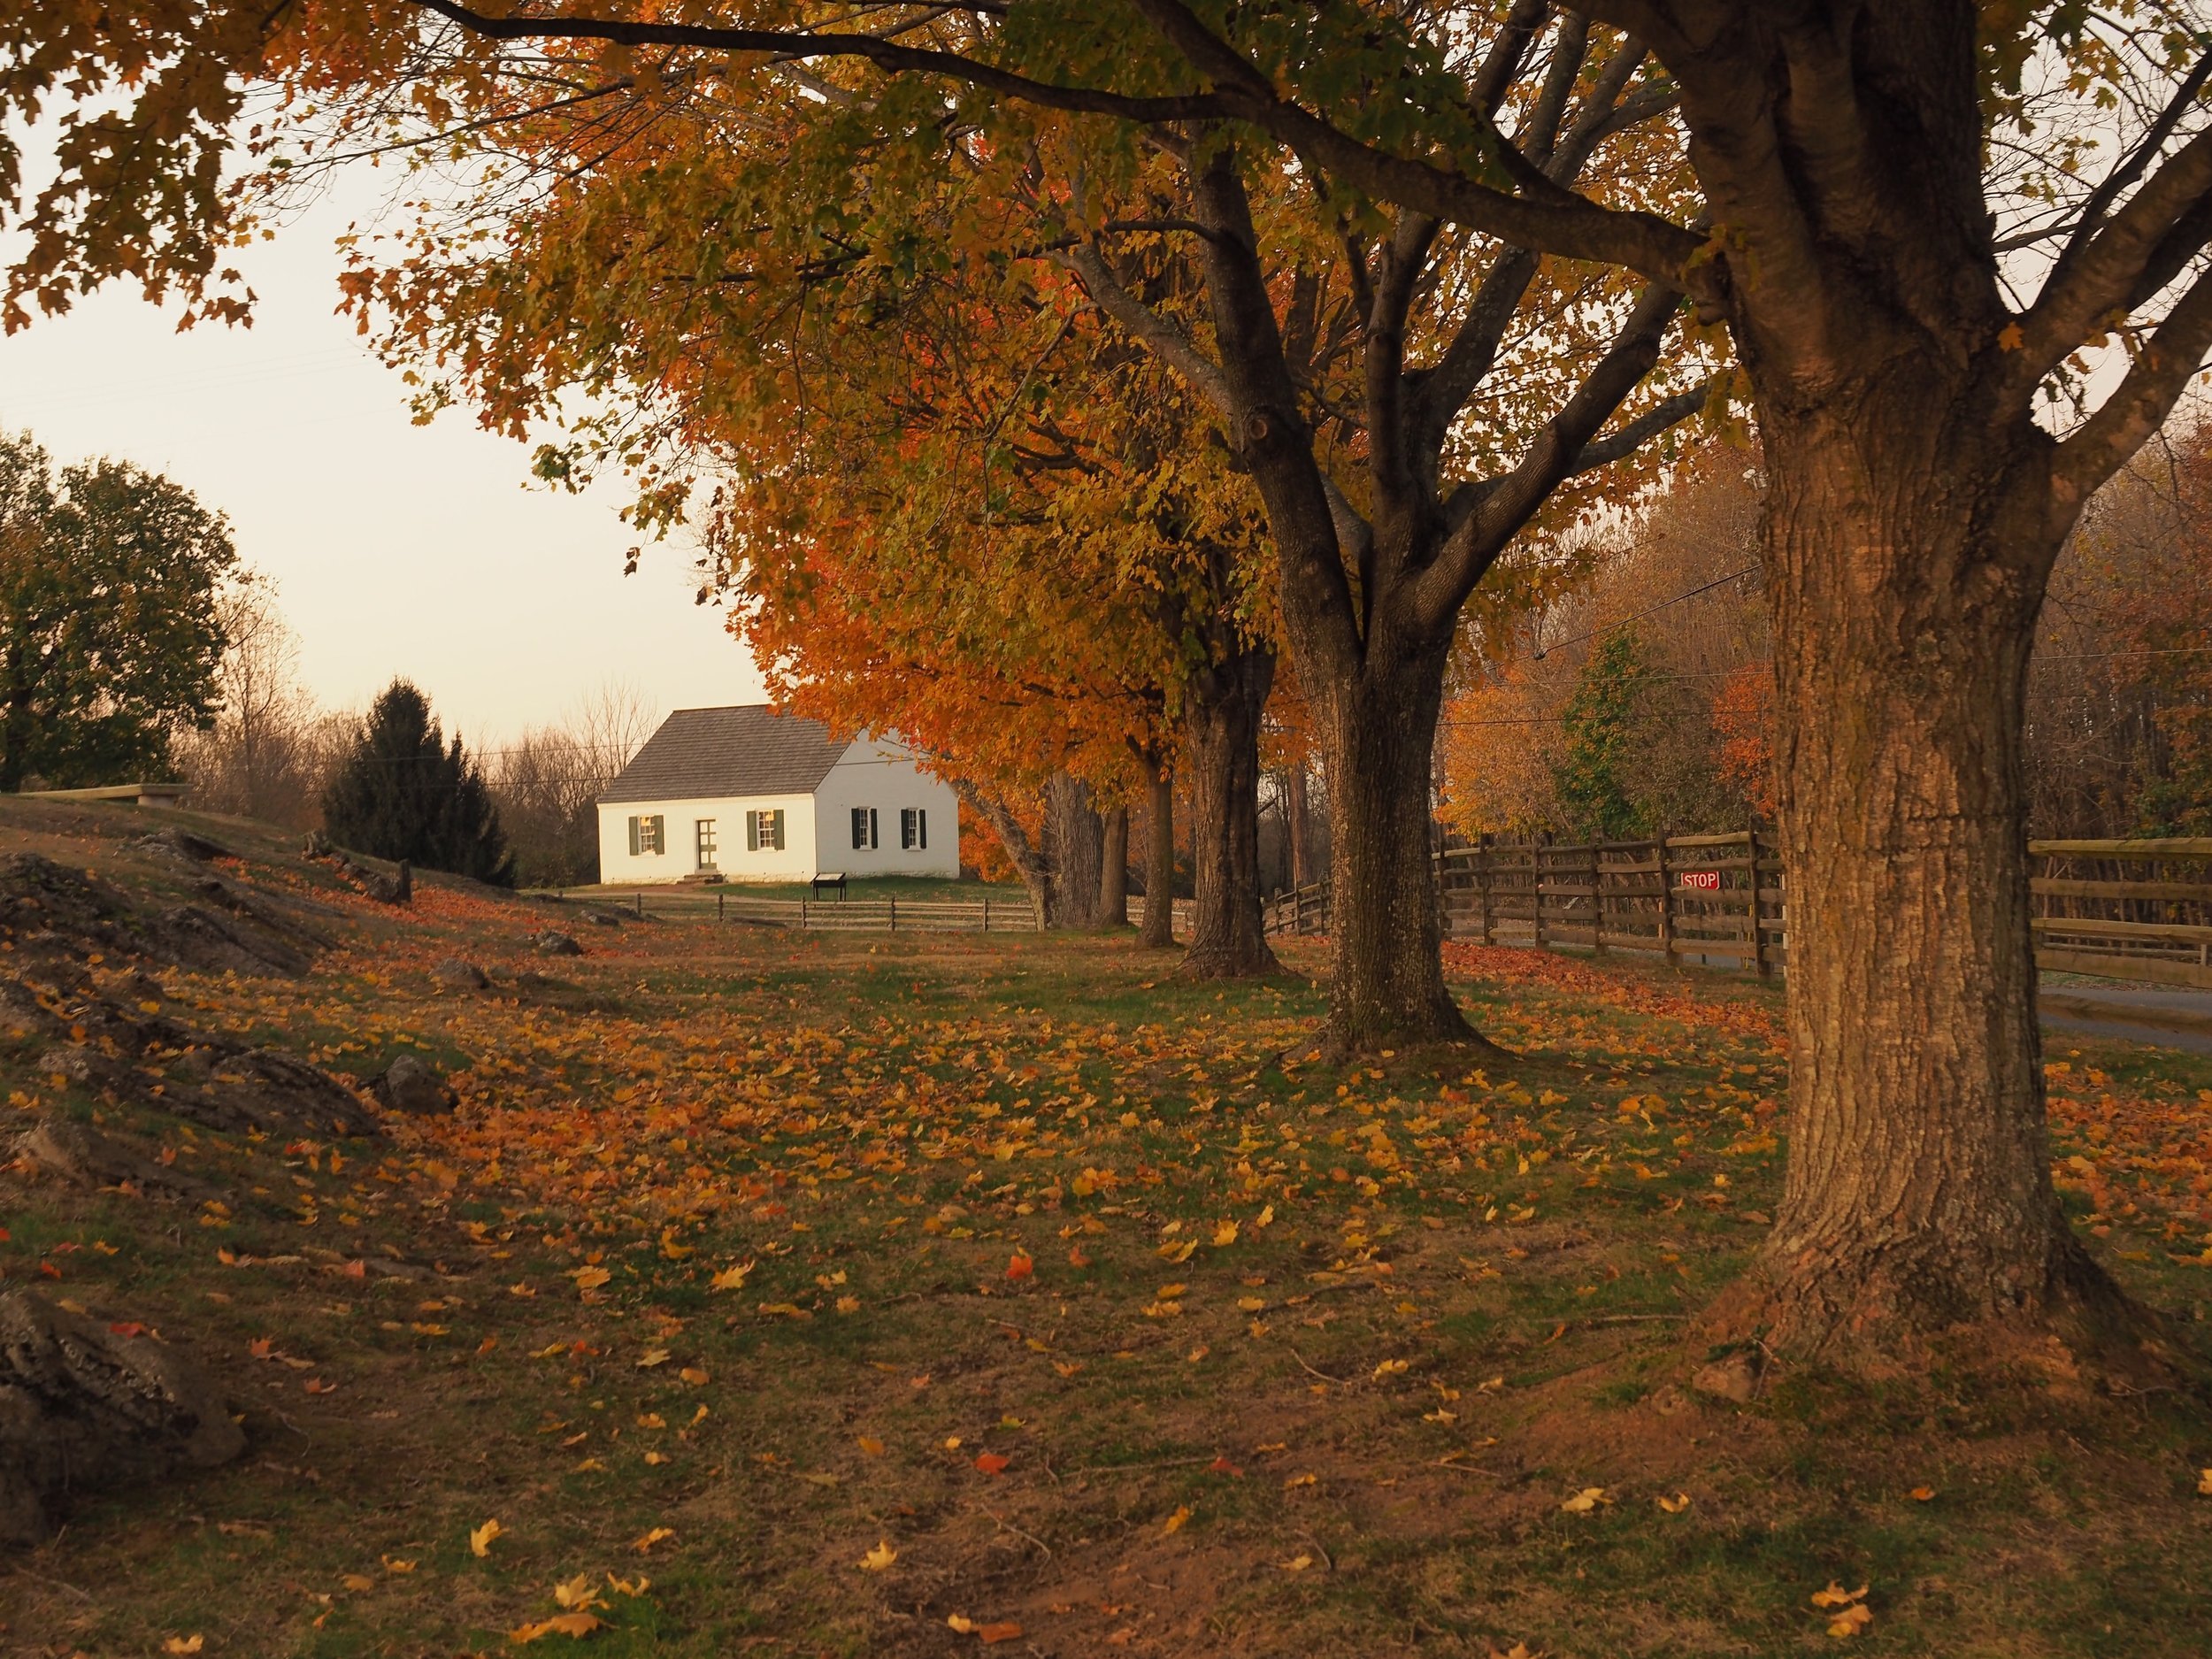
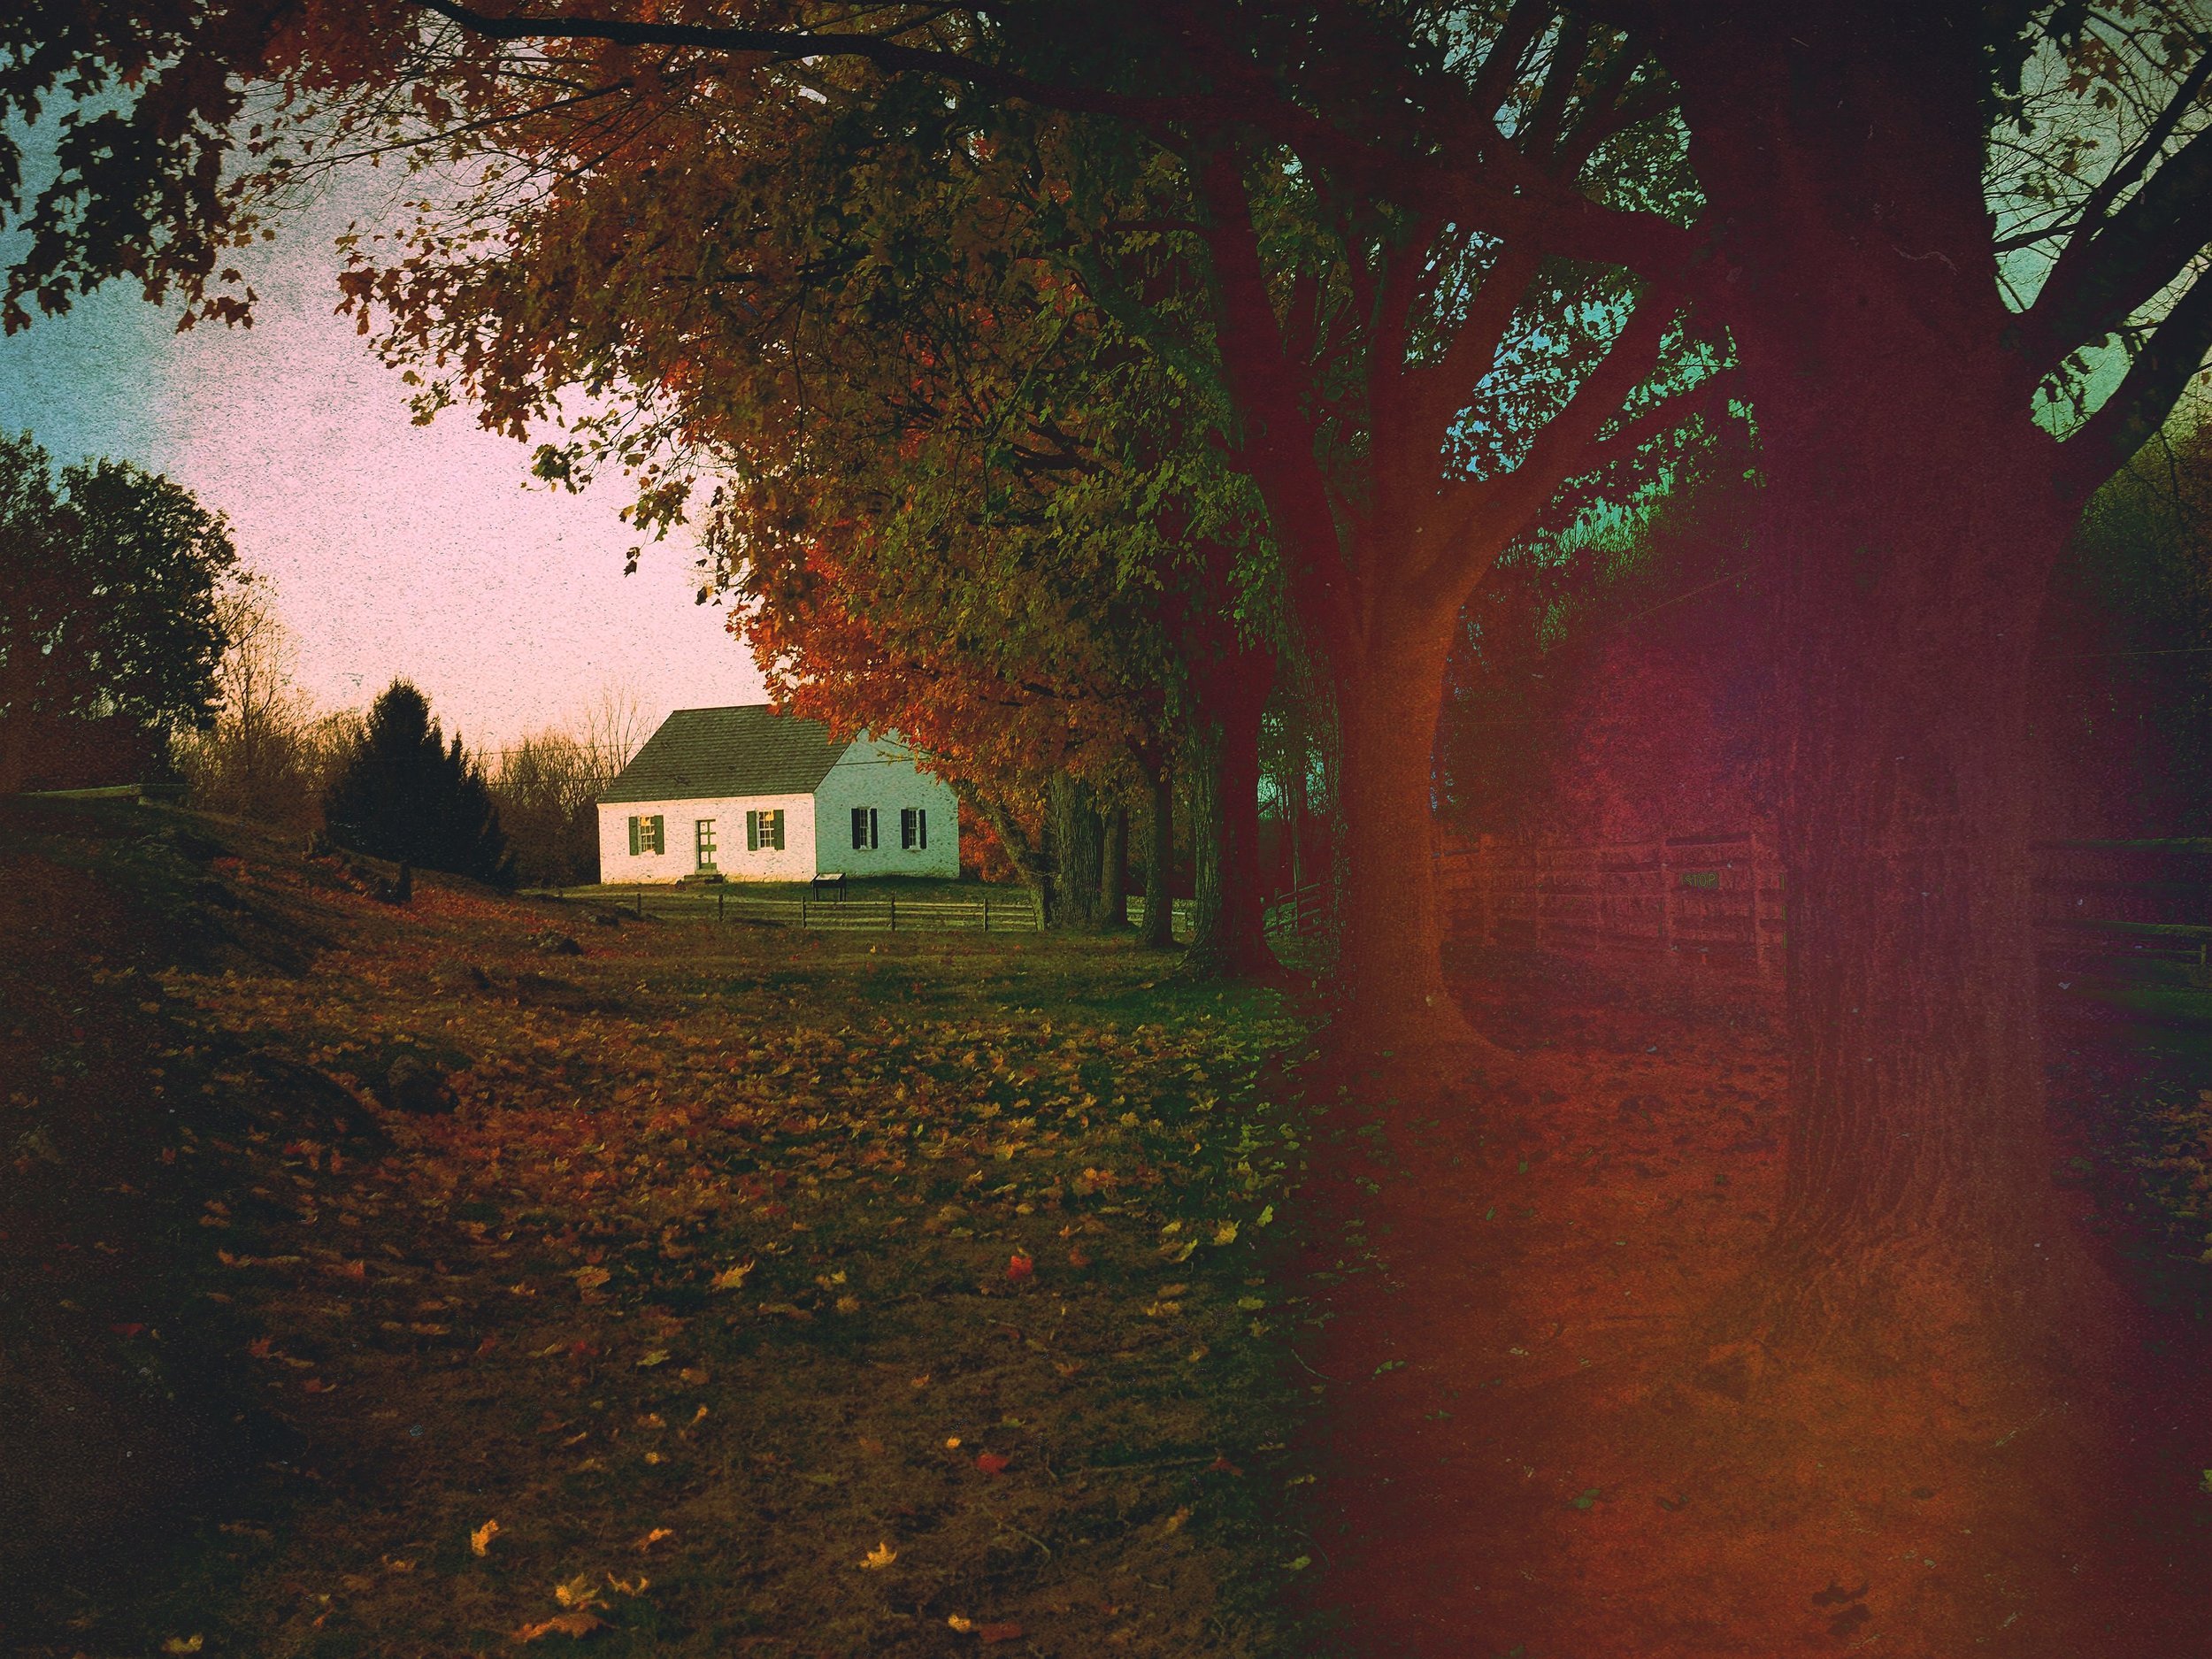
I thought this photo would be perfect because of the natural lines created by the trees and fence and the great color sprinkled across the grass thanks to those autumnal leaves. Candelabra from Light Leaks 2 blended in Difference mode gives me that gnarly light burned across the right hand side of the shot. With SEA BOUND from Dust and Dirt I add texture and a touch of fade. TWILIGHT from Vintage Gradients helps to set up my process of blending colors together by smoothing out the greens and adding a little contrast. Again, I turn to X-film for my final overlay selecting Azure to further smooth my colors and cool off those oranges and reds. I felt like the P-CROSS PROCESS film preset allowed me to pull together the kinda-sorta creepy vibe that I was working towards. From there I toy with the adjustment tools to even out my tones and colors and sharpen up the image a bit.
